HOW I SHOT IT - VALLEY FORGE PHOTO
Learning to get out of your own way…
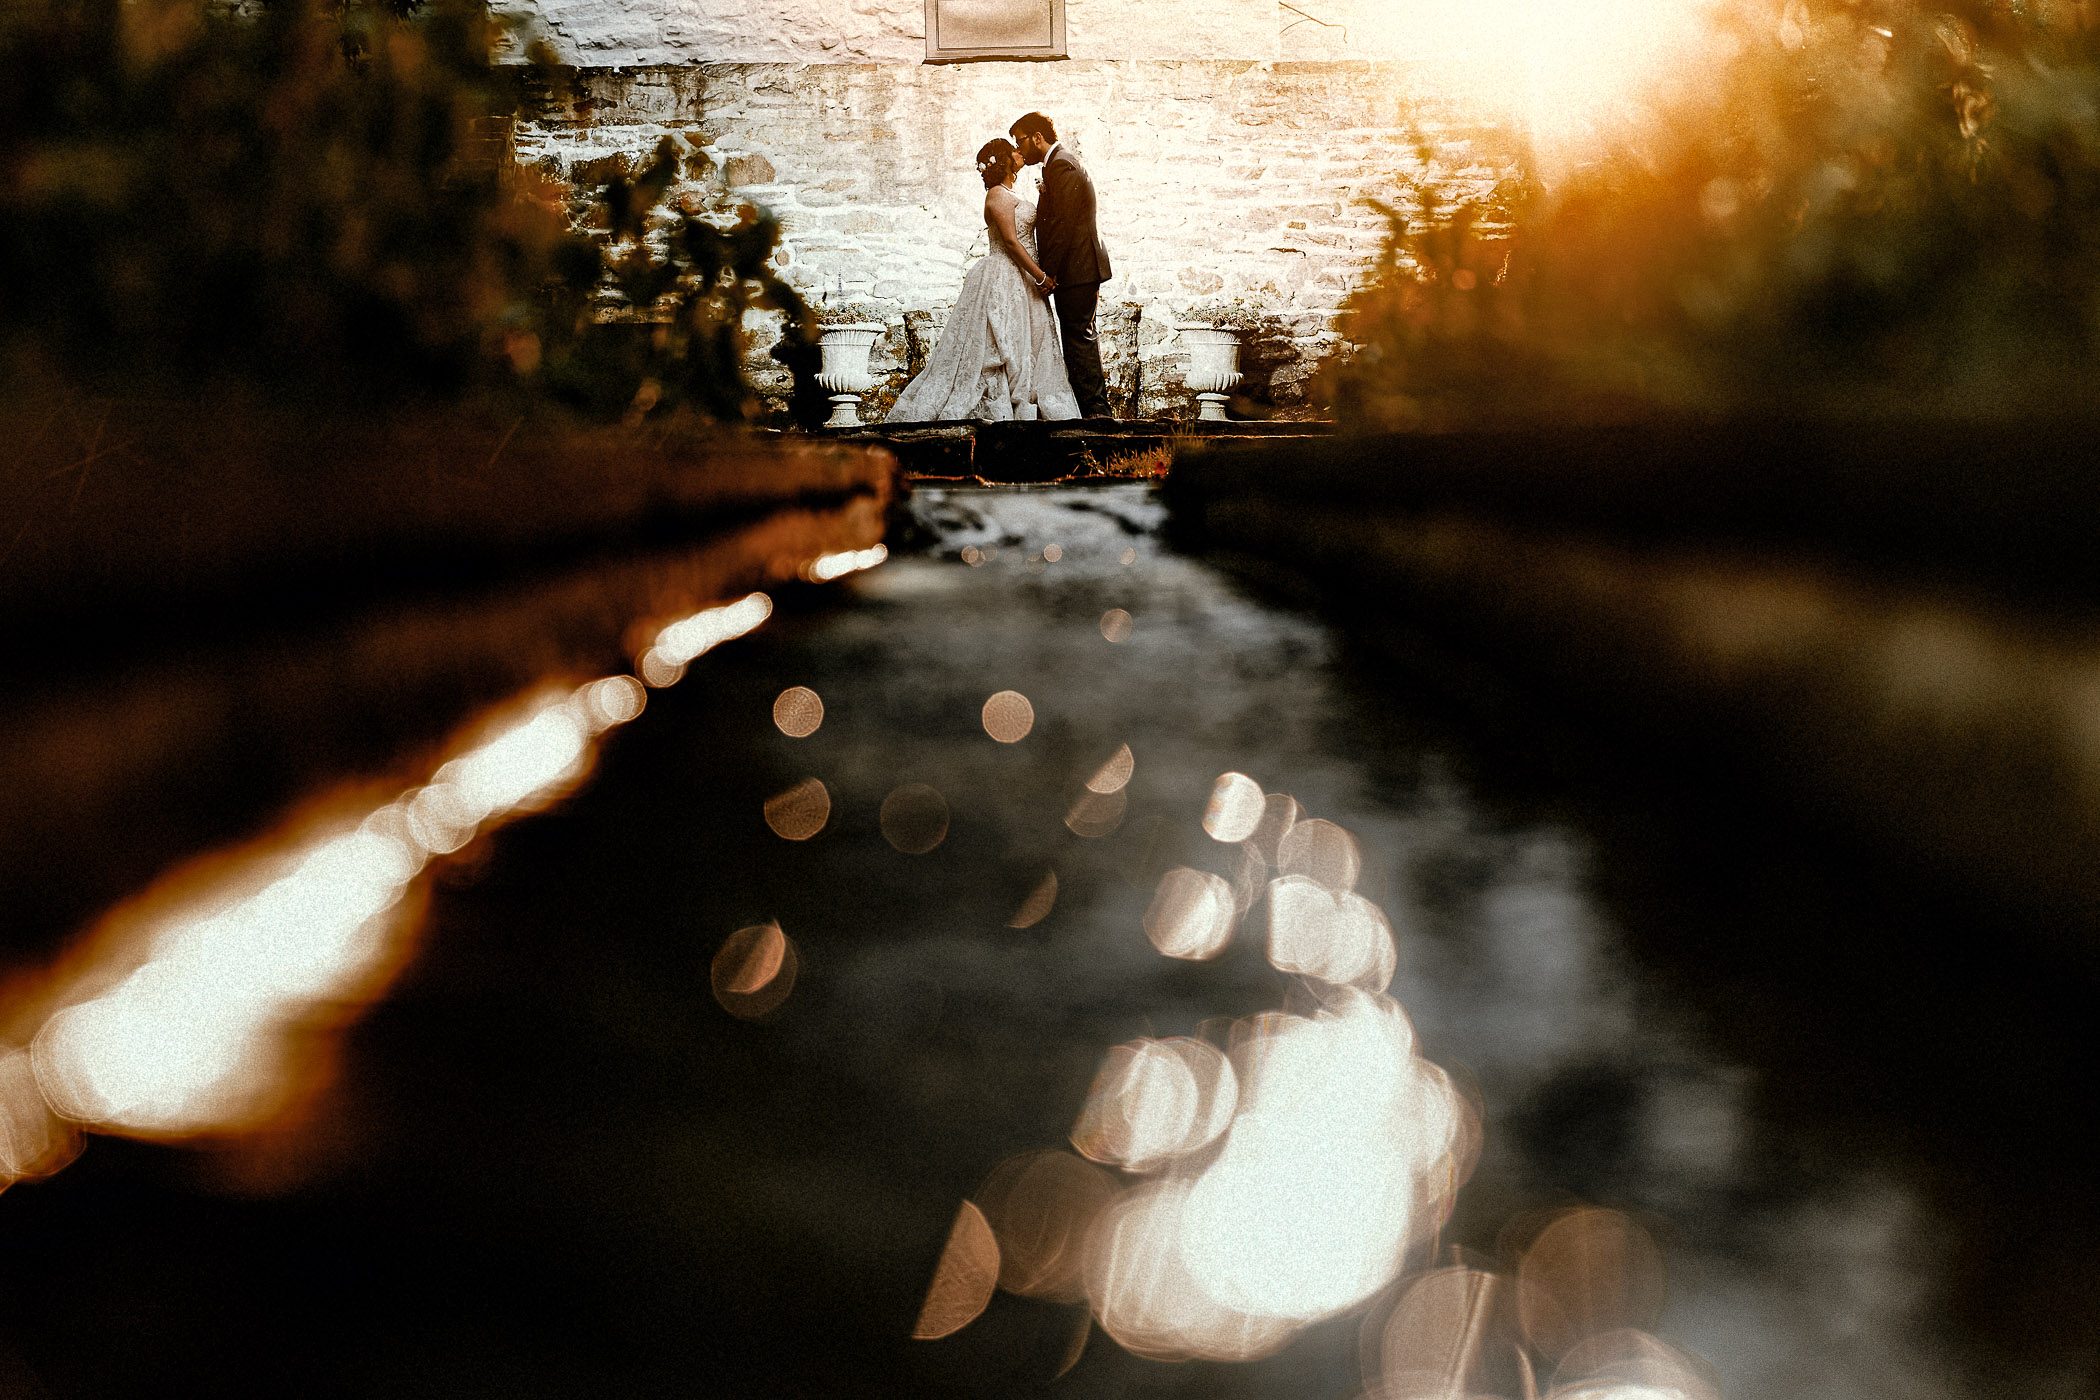
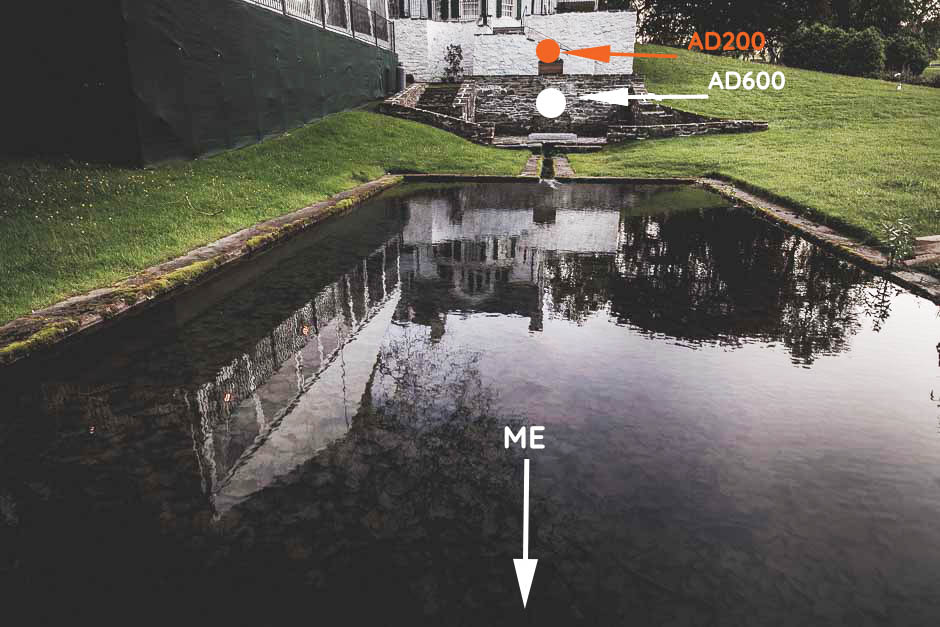
That phrase really is the best way to describe how I created this shot. This was taken after the sun had already dropped down below the tree line at a beautiful venue in the Valley Forge Historical Park, called The Philander Chase Knox Estate. It’s a venue that I’ve shot at 5 or 6 times now over the past 3 years. The spot that I took these three photos is one that I’ve literally stared at more times than I can remember, simply trying to figure out a creative way of shooting it. It’s a simple man-made pond with a brick walk-way surrounding it. On one end, up near the estate, there’s a little area made of brick that was probably built by hand in the 1700’s, with a small water fountain and concrete statue. On the other end, if you look closely at the photo below, you can see there’s a concrete lined canal or or waterway that leads down to a river. There’s an identical concrete canal on the estate side as well which is a little easier to see in the cell phone photos I had the venue send me. Each canal was made of concrete and had about 6 inches of water running through them.
In the past, I’ve shot photos using reflections from the pond and other similar shots with the estate in the background but nothing that I’ve ever really been happy with. Each time I walk out the back door of the estate it looks at me and screams that there’s creative ways to shoot it which absolutely drives me crazy because until this past wedding, it’s only left me scratching my head.
So, what was the difference this time? Before I took any gear out of my bags, I walked out back and looked at it as if it were the very first time. I forced myself to forget all of the other ideas I’ve had that didn’t work, or simply weren’t all that creative. I’m sure some of you experience this as well, but I have a bad habit of going through the same creative thought process over and over again. Going through the same mental steps that for the most part have treated me pretty good over the years. Well, breaking that process can be pretty challenging but I was hoping that it would be what I needed to finally create something artistic that my clients would love and I would be happy with.
I walked around the entire pond, looked at it from different angles, but blocked out any thoughts of gear or lighting (both natural and artificial), and within just a few minutes had a brand new idea in my head. I squatted down about 15 feet down the concrete canal between the pond and the stream and had a pretty good vision of what I wanted to capture and how I wanted to do it. Later that night just as the sun went down, I set the shot up, took a couple of test shots and was ready to go.
As much as I feel confident in my creative thought process that I typically use, I’ve been trying more and more to switch things up and break it now. This is the shot I’ve known was there all along, I just had to find it... with new eyes.
FEARLESS PHOTOGRAPHERS - Right On Awards
I simply placed the bride and groom exactly where I wanted them (right in front of the brick wall up near the estate) and asked them to take a few minutes to themselves away from all the excitement. I brought two camera/lens combos with me as I walked around to the other side of the pond and basically laid down over top of the water canal leading down to the stream. There was a concrete ledge about 6 inches wide on each side where I was able to put my knees and elbows.
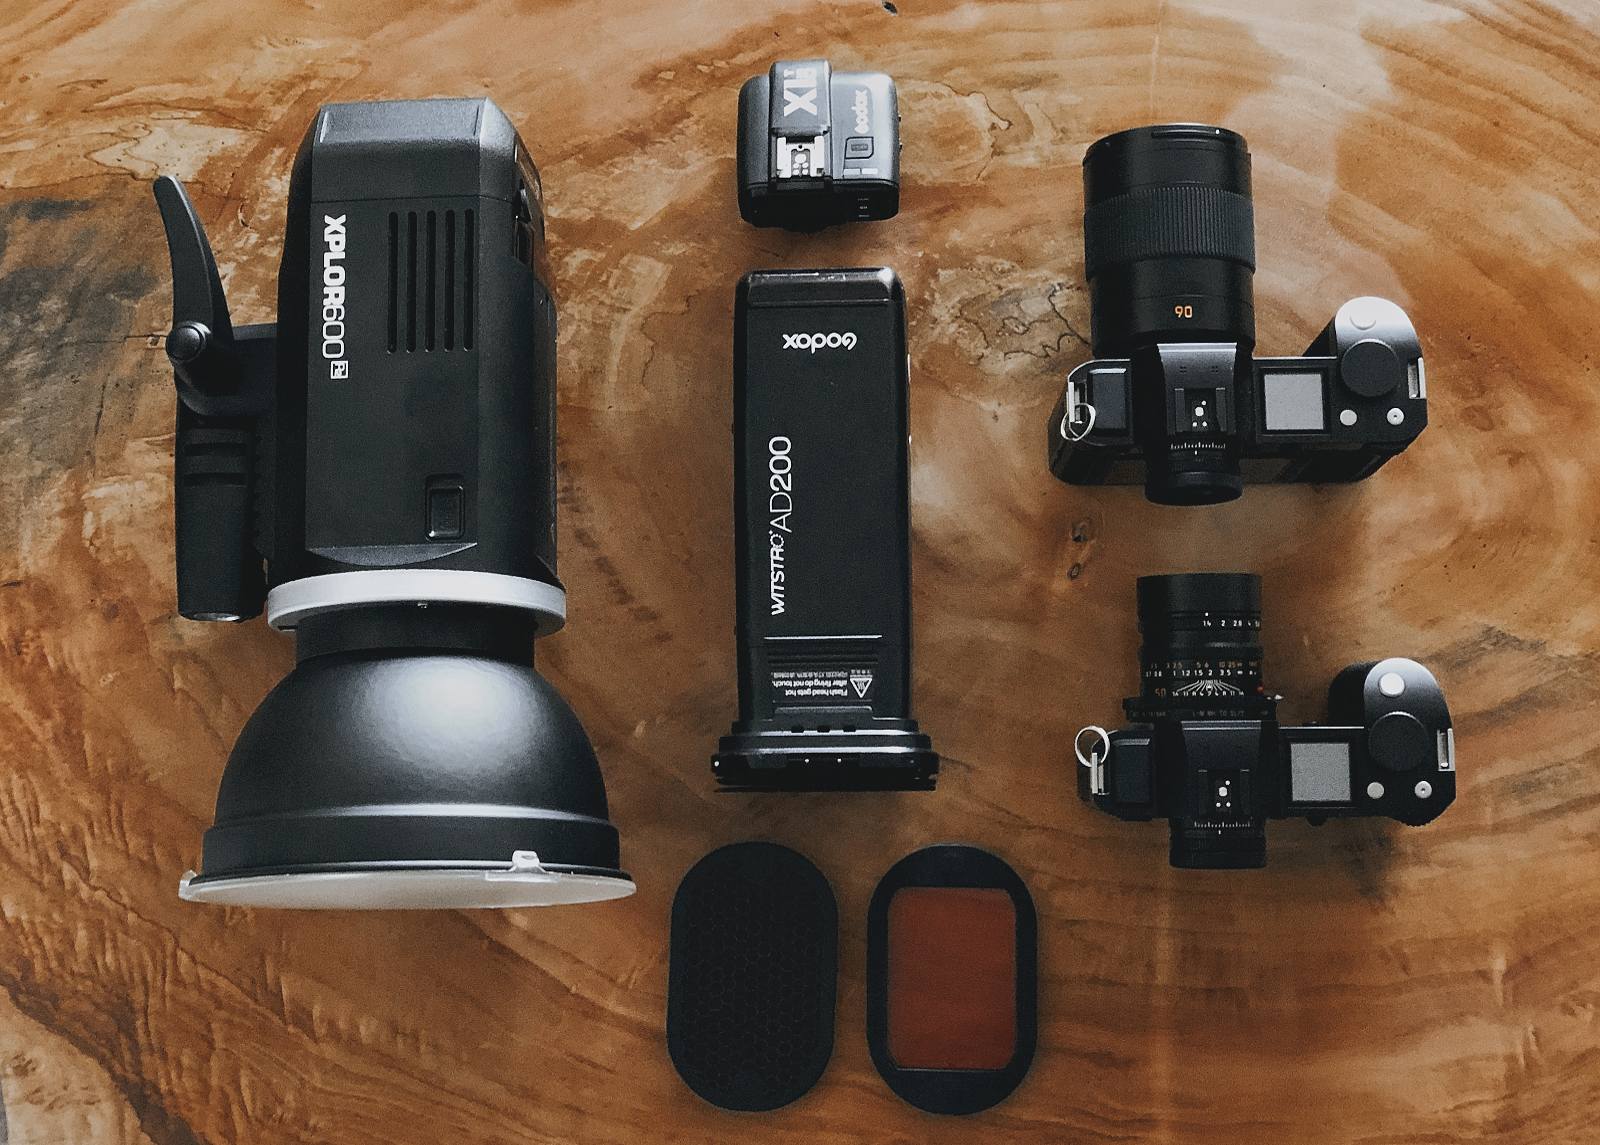
The first couple shots I took using the Leica SL and 50mm Summilux M-mount because I specifically wanted to use a little lens flare to help add that little something extra to the composition and draw the viewer’s attention right where I wanted it. I had an AD200 strobe up near the estate, behind the brick wall, about 6 feet above the bride and groom. It was aimed right at me with a Magmod grid and full CTO (my setup for creating lens flare when I don’t have the sun). From my test shot below, you can see how there isn’t a lot of separation between my wife and the brick wall, so I wanted to add another light to create a little more. I put an AD600 strobe right behind the bride and groom, about chest height so that it wouldn’t be too much work to edit out, and I aimed it right at the wall behind them. This brightened the wall and gave me the separation I wanted to see, really making them stand out.
It only took me 3 shots to get the photo I was looking for and the lens flare exactly how I wanted it. I then had Sandi move the AD200 and move it off to the side a little so it wasn’t directly behind the couple anymore. I switched to the SL and 90mm setup and took a few shots. That was it, done.
The first shot below was taken with the 90mm and the black and white photo was taken with the 50mm, only I turned off the AD200 and only triggered the AD600.
Leica SL + Leica 50mm Summilux | Only the AD600 behind the bride and groom
GEAR
COMING SOON:
I just filmed a video tutorial on how I create that beautiful golden hour sun using just one light (GoDox AD200) and what I use to get the awesome lens flare you see in the shot above. It’s all in the light, the lens, and the way that I shoot it, none of the lens flare you see in my photos is created in post.


